What Is an Audio Interface and Why Do You Need One? A Beginner’s Guide
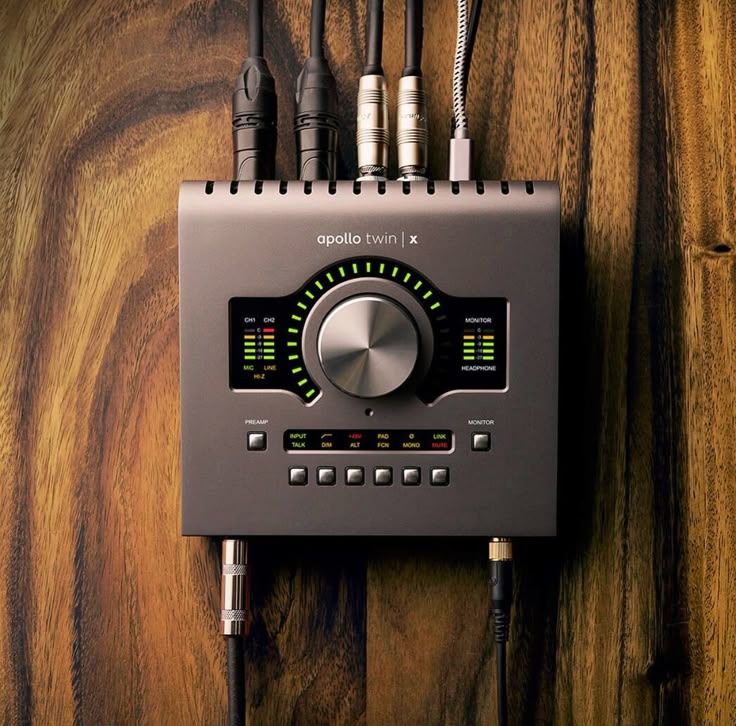
What Is an Audio Interface and Why Do You Need One? What Is an Audio Interface? An audio interface is a piece of hardware used for recording and playback of audio. It acts as a bridge between your physical audio equipment and your computer. For example, if you want to record vocals, the microphone produces an analog electrical signal. The audio interface converts that signal into digital data that your computer and DAW can understand. During playback, the process works in reverse. The interface converts digital audio from the computer back into an analog signal that your headphones or speakers can reproduce. How Does an Audio Interface Work? An audio interface performs several important jobs. 1. Analog-to-Digital Conversion When you record a microphone or instrument, the signal is analog. The interface converts it into digital audio. This process is called: ADC — Analog-to-Digital Conversion The digital signal can then be recorded inside your DAW. 2. Digital-to-Analog Conversion When you play your project, the DAW sends digital audio to the interface. The interface converts it back into an analog signal. This is called: DAC — Digital-to-Analog Conversion The signal can then be sent to: Studio monitors Headphones External equipment Why Do You Need an Audio Interface? An audio interface becomes important when you want to connect professional audio equipment to your computer. Main Benefits Better Recording A good interface provides clean microphone and instrument inputs. Better Monitoring You can connect professional headphones and studio monitors directly. Lower Latency Audio interfaces can provide lower monitoring latency, which is important when recording vocals or instruments. More Inputs and Outputs You can connect multiple microphones, instruments, synthesizers, and other equipment. Better Connectivity An interface provides connections designed specifically for audio production. What Can You Connect to an Audio Interface? An audio interface can connect many types of equipment. Microphones You can connect: Dynamic microphones Condenser microphones Some ribbon microphones For condenser microphones, you may need 48V phantom power. Instruments Many interfaces include instrument inputs for: Electric guitar Bass guitar Synthesizers Keyboards An instrument input is commonly called an Hi-Z input. Studio Monitors Your interface can send audio to professional studio monitors. Typical connections include: TRS XLR RCA The exact connection depends on the interface and speakers. Headphones Most interfaces include a dedicated headphone output. This allows you to monitor recordings without disturbing others. What Is Phantom Power? If you use a condenser microphone, you may see a button labeled: 48V This is phantom power. Phantom power supplies the electrical power required by many condenser microphones. Important Always check your microphone’s requirements before enabling phantom power. Do not assume every microphone needs it. What Are the Main Parts of an Audio Interface? Understanding the front and back panels makes an interface much easier to use. Front Panel You may find: Microphone inputs Gain controls Headphone output Headphone volume Instrument input 48V phantom power Input meters Back Panel Depending on the model, you may find: Monitor outputs Line outputs MIDI connections Digital inputs and outputs USB or Thunderbolt connection What Is Gain on an Audio Interface? Gain controls the amount of amplification applied to the incoming microphone or instrument signal. This is different from the volume control of your speakers or headphones. For recording, you want a healthy signal without clipping. Basic Recording Rule Set the gain so your loudest performance has enough headroom and does not reach digital clipping. Watch your DAW’s input meter while the performer records. Audio Interface vs Computer Sound Card These two devices perform similar basic functions, but they are designed for different purposes. Computer Sound Card Audio Interface Designed for general computer audio Designed for music and audio production Limited inputs Multiple professional inputs available Basic microphone connectivity XLR/TRS microphone and instrument connections Limited monitoring options Dedicated headphone and monitor outputs Less flexible Designed for studio workflows For serious recording and music production, an audio interface is usually the more practical choice. Do You Need an Audio Interface for Music Production? Not always. If you only use: Software instruments MIDI keyboards Headphones Virtual effects you can technically produce music without an audio interface. However, an interface becomes highly useful when you want to: Record vocals Record guitars Record instruments Connect studio monitors Record synthesizers Use professional microphones Build a recording studio How to Choose an Audio Interface Choosing an interface depends on your workflow. 1. Number of Inputs Think about what you need to record. For example: Solo Producer A 1–2 input interface may be enough. Vocalist + Guitarist Two inputs may be useful. Full Band You may need 8 or more microphone inputs. 2. Number of Outputs More outputs become useful when connecting: Studio monitors Headphone amplifiers External hardware Multiple monitoring systems 3. Connection Type Common computer connections include: USB USB-C Thunderbolt Check compatibility with your computer before purchasing. 4. Preamp Quality Microphone preamps amplify the relatively weak signal coming from a microphone. A good preamp should provide clean amplification with low unwanted noise. How to Connect an Audio Interface A basic setup is straightforward. Step 1 Connect the interface to your computer. Step 2 Install the required software or drivers if necessary. Step 3 Connect your microphone or instrument. Step 4 Connect your headphones or studio monitors. Step 5 Select the interface as the audio device in your DAW. Step 6 Set the correct input on your recording track. Step 7 Adjust the gain and check your input meter. Step 8 Record a test signal before starting the actual session. Common Mistakes Beginners Should Avoid Setting Gain Too High This can cause clipping and distortion. Forgetting Phantom Power A condenser microphone may not work correctly without the required power. Connecting Monitors Incorrectly Always check the correct output connections and routing. Ignoring Buffer Settings Incorrect buffer settings can cause unnecessary latency or audio glitches. Buying More Inputs Than You Need Choose an interface based on your actual recording requirements. Audio Interface in a Home Studio Setup A basic home studio signal chain might look like this: Microphone →
What Is an Audio Interface and Why Do You Need One? A Beginner’s Guide Read More »